To provide continued access to essential health services during the COVID-19 pandemic, the Australian Government expanded Medicare-subsidised telehealth services for all Australians.
THE SYDNEY MELANOMA DIAGNOSTIC CENTRE remains open. However, we are operating at a reduced clinic capacity each day so priority will still be given to patients with lesions of concern, high-risk patients, confocal microscopy, monitoring appointments and scheduled procedure appointments; as well as existing melanoma patients with significant history.
We are still conducting Telehealth appointments for patients when required and for new and existing patients.
Instructions for Telehealth Appointment
If a new Telehealth appointment has been set up for you, there are several steps you will need to follow in order to be ready for the appointment:
-
In order to proceed with your telehealth appointment, you will need to have a device with a camera and microphone with the application called Zoom (follow this link to sign up for free and download the app: https://zoom.us). Using phones for these consultations is discouraged as it can cause limitations during the consultation, e.g., between holding the phone up and showing the lesion at the same time.
-
If you have a particular spot/lesion of concern you will need to take photographs following the “Photography instructions” and upload them either via DermEngine app or send them by email to info@melanoma.net.au This should be done at least one day prior to the appointment time to allow your doctor to review the images prior to your telehealth visit.
-
If your 6 monthly routine skin check has been booked as a telehealth appointment, please first check your total body photographs at home with the help of a partner and identify any new or changing spot. Then take photos of these spots and send them to us as described in point 2.
-
Patients who have a Molescope will be able to send the dermoscopy images directly via DermEngine.
-
Before the time of your appointment, our staff will send you an email with the Zoom unique number/link, which you will need to enter into the meeting.
-
At the time of your appointment, you will connect and will be greeted by our administrative staff that will help you with any issue you may encounter while using the program. Then your doctor will join the meeting and the administrative staff will leave.
During the telehealth appointment, your doctor will assess the lesion and determine if it needs an urgent review by an on-site doctor or it can wait until the routine skin check.
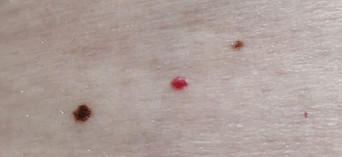
How to Take a Picture for your Dermatologist


We recommend sending two types of images: a faraway image and a close-up image.
Lighting
-
Take your images in a well-lit area. Natural light is the best. Take care to avoid harsh light or a reflected shadow.
Background
-
If possible, have a solid background in your photo.
-
Remove any jewellery or watches that may distract your dermatologist.
Field of View
-
Take both a faraway image and a close-up image of your rash or spot.
-
The close-up image should have equal parts of healthy skin surrounding the spot or rash.
Image Orientation
-
If possible, have a second person take the image so that your head is at the top of the image.
-
If you are taking the image yourself, make sure that you consistently take the image at the same camera angle (horizontally or vertically).
-
Faraway images should include “landmarks,” such as an ankle, shoulder or elbow, to help your dermatologist understand where the rash or spot is located on your body.
Focus/Resolution
-
The rash or spot should be in the center of the images.
-
Make sure that your images are in focus.
-
You should be able to see the hair follicles or wrinkles on your skin.
Scale
-
If possible, use a ruler in your close-up image to give your dermatologist an idea of how large the area of interest is.
For more detailed instructions, you can view this video: https://vimeo.com/369733339
SAMPLE:
Faraway/medium distance image Close-up image Dermoscopy/ "Tape" image


For Dermoscopy images:
-
If you have a Molescope, simply use it as usual to take the dermoscopy images.
-
If you DO NOT have a Molescope, you can use as an alternative:
-
“Tape and oil method”:
-
Material: Clear sticky tape and oil
-
Steps:
-
Apply a drop of oil on the spot
-
Stick the tape on the top
-
Take a close up photo (macro, 20 cm distance)
-
-
-
-
"Oil only" method (cooking oil)
-
Steps:
-
Apply a drop of oil on the spot
-
Take 1-3 close up photos (at a distance 20-30 cm, angle about 45º)
-
-
Image courtesy of Prof Andreas Blum and Michelle Menzies
Image courtesy of Prof Andreas Blum and Michelle Menzies